Windows API'de form üzerine bir resim ekleme
Kategori: Yazılım
Windows API'de form üzerine bir resim eklemek için Static kontrol kullanabiliriz. Static kontrol oluştururken SS_ICON parametresini eklememiz gerekir.
Proje içinde oluşturacağımız bir resource dosyasına (resource.rc) dahil ettiğimiz bir resim dosyasını LoadImage() fonksiyonu ile okutarak ve STM_SETIMAGE mesajını static kontrole göndererek, penceremize bir resim ekleyebiliriz.
1. Öncelikle Burada gösterildiği gibi bir Windows API projesi oluşturalım. Projeyle birlikte otomatik olarak oluşturulan main.c dosyası içine aşağıda gösterilen kodları ekleyelim:
#include "resource.h"

HWND hwndStaticImage;
HANDLE iconBG;

case WM_CREATE:
    hwndStaticImage = CreateWindowEx(WS_EX_TRANSPARENT, "STATIC", "", WS_CHILD | WS_VISIBLE | SS_ICON, 100, 100, 100, 120,
                                  hwnd, 0, NULL, NULL);
    iconBG = LoadImage(GetModuleHandle(NULL), MAKEINTRESOURCE(IDI_ICONBG), IMAGE_ICON, 100, 120, LR_SHARED);
    SendMessage(hwndStaticImage, STM_SETIMAGE, (WPARAM)IMAGE_ICON, (LPARAM)iconBG);
    break;
Static kontrol oluştururken SS_ICON parametresinin eklendiğine dikkat ediniz.
Proje içinde oluşturacağımız bir resource dosyasına (resource.rc) dahil ettiğimiz bir resim dosyası LoadImage() fonksiyonu ile okutulur.
Static kontrol pencersine STM_SETIMAGE mesajı gönderilerek resim static kontrole atanır.
Yukarıdaki kodları eklediğimizde, main.c dosyasının en son hali aşağıdaki şekilde olacaktır.
main.c
#if defined(UNICODE) && !defined(_UNICODE)
    #define _UNICODE
#elif defined(_UNICODE) && !defined(UNICODE)
    #define UNICODE
#endif

#include
#include
#include "resource.h"

/*  Declare Windows procedure  */
LRESULT CALLBACK WindowProcedure (HWND, UINT, WPARAM, LPARAM);

/*  Make the class name into a global variable  */
TCHAR szClassName[ ] = _T("DenemeApp");

HWND hwndStaticImage;
HANDLE iconBG;

int WINAPI WinMain (HINSTANCE hThisInstance,
                     HINSTANCE hPrevInstance,
                     LPSTR lpszArgument,
                     int nCmdShow)
{
    HWND hwnd;               /* This is the handle for our window */
    MSG messages;            /* Here messages to the application are saved */
    WNDCLASSEX wincl;        /* Data structure for the windowclass */

    /* The Window structure */
    wincl.hInstance = hThisInstance;
    wincl.lpszClassName = szClassName;
    wincl.lpfnWndProc = WindowProcedure;      /* This function is called by windows */
    wincl.style = CS_DBLCLKS;                 /* Catch double-clicks */
    wincl.cbSize = sizeof (WNDCLASSEX);

    /* Use default icon and mouse-pointer */
    wincl.hIcon = LoadIcon (NULL, IDI_APPLICATION);
    wincl.hIconSm = LoadIcon (NULL, IDI_APPLICATION);
    wincl.hCursor = LoadCursor (NULL, IDC_ARROW);
    wincl.lpszMenuName = NULL;                 /* No menu */
    wincl.cbClsExtra = 0;                      /* No extra bytes after the window class */
    wincl.cbWndExtra = 0;                      /* structure or the window instance */
    /* Use Windows's default colour as the background of the window */
    wincl.hbrBackground = (HBRUSH) COLOR_BACKGROUND;

    /* Register the window class, and if it fails quit the program */
    if (!RegisterClassEx (&wincl))
        return 0;

    /* The class is registered, let's create the program*/
    hwnd = CreateWindowEx (
           0,                       /* Extended possibilites for variation */
           szClassName,             /* Classname */
           _T("Deneme Uygulaması"), /* Title Text */
           WS_OVERLAPPEDWINDOW,     /* default window */
           CW_USEDEFAULT,           /* Windows decides the position */
           CW_USEDEFAULT,           /* where the window ends up on the screen */
           544,                     /* The programs width */
           375,                     /* and height in pixels */
           HWND_DESKTOP,            /* The window is a child-window to desktop */
           NULL,                    /* No menu */
           hThisInstance,           /* Program Instance handler */
           NULL                     /* No Window Creation data */
           );

    /* Make the window visible on the screen */
    ShowWindow (hwnd, nCmdShow);

    /* Run the message loop. It will run until GetMessage() returns 0 */
    while (GetMessage (&messages, NULL, 0, 0))
    {
        /* Translate virtual-key messages into character messages */
        TranslateMessage(&messages);
        /* Send message to WindowProcedure */
        DispatchMessage(&messages);
    }

    /* The program return-value is 0 - The value that PostQuitMessage() gave */
    return messages.wParam;
}

/*  This function is called by the Windows function DispatchMessage()  */
LRESULT CALLBACK WindowProcedure (HWND hwnd, UINT message, WPARAM wParam, LPARAM lParam)
{
    switch (message)                  /* handle the messages */
    {
       case WM_CREATE:
            hwndStaticImage = CreateWindowEx(WS_EX_TRANSPARENT, "STATIC", "", WS_CHILD | WS_VISIBLE | SS_ICON, 100, 100, 100, 120,
                                          hwnd, 0, NULL, NULL);
            iconBG = LoadImage(GetModuleHandle(NULL), MAKEINTRESOURCE(IDI_ICONBG), IMAGE_ICON, 100, 120, LR_SHARED);
            SendMessage(hwndStaticImage, STM_SETIMAGE, (WPARAM)IMAGE_ICON, (LPARAM)iconBG);
            break;

        case WM_DESTROY:
            PostQuitMessage (0);       /* send a WM_QUIT to the message queue */
            break;
        default:                       /* for messages that we don't deal with */
            return DefWindowProc (hwnd, message, wParam, lParam);
    }

    return 0;
}
2. resource.h adlı bir dosya oluşturarak içeriğini aşağıdaki şekilde düzenleyelim.
resource.h
#include <windows.h>

#define IDI_ICONBG 1001
3. resource.rc adlı bir dosya oluşturarak içeriğini aşağıdaki şekilde düzenleyelim.
resource.rc
#include "resource.h"

IDI_ICONBG ICON "bglogo.ico"
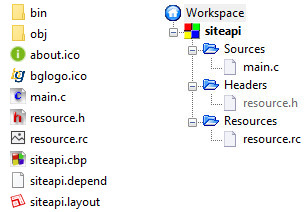
4. Program kaynak kod dosyalarının bulunduğu dizinde bglogo.ico adlı bir resim dosyası oluşturalım.
Yaptığımız işlemler sonucunda, proje içinde yer alan dosyalar ve IDE içindeki görünümü aşağıdaki fotoğraftaki şekilde olacaktır.
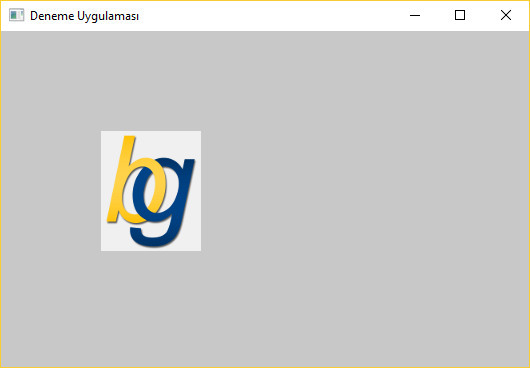
Program derleyip çalıştırdığımızda aşağıdakine benzer bir ekran görüntüsü karşımıza gelecektir: